Orange Mini Cheesecakes with Grand Marnier Cream

By - No comments:
orange-cheesecake-for-web.jpg
When I bought my mini cheesecake pan, I really wasn’t sure whether I would use it. There are so many pieces of baking equipment stuffed into the back of my kitchen cabinets that never see the light of day, much less feel the heat of my oven. But I have used this pan over and over, much to the delight of my friends and neighbors. I receive so many compliments on the tiny cheesecakes that I almost feel guilty because they are so quick and easy to make! The cheesecake pan came with a starter recipe but I have had a lot of fun adapting it and creating new recipes. There are oranges everywhere in Sicily right now and I can’t get enough of them! I’ve been juicing them, peeling and eating them, adding them to green salads, and now their zest brightens up my latest mini cheesecake recipe. The Grand Marnier whipped cream is an optional but very delicious addition to these little cheesecakes.
Orange Mini Cheesecakes with Grand Marnier Cream
For this recipe, you will need a mini cheesecake pan
Crust:
1 C. graham cracker crumbs
2 T. brown sugar
1/3 stick melted butter
Filling:
1 8 oz. package cream cheese, room temperature
1/3 C. sour cream
1 egg + 1 egg yolk
1/3 C. sugar
finely grated zest of one orange
Topping:
1 C. heavy cream
1 T. Grand Marnier
2 T. powdered sugar
  1. Preheat oven to 375 degrees.
  2. In a medium bowl, mix graham cracker crumbs, sugar and butter with a fork until well combined.
  3. Divide crumb mixture evenly between the 12 cups of your mini-cheesecake pan. Using your fingers or the back of a tablespoon, press crumbs firmly onto the bottom and partially up the sides of each cup; set aside.
  4. (optional step) Combine sugar and orange zest in a mini food processor and process until orange zest has been incorporated and sugar is fine.
  5. Using an electric mixer, blend softened cream cheese, sour cream, egg, and orange sugar together in a medium bowl. (if you skipped step 4, add both the sugar and orange zest in step 5)
  6. Spoon cream cheese mixture into the twelve cups, trying to divide the mixture as evenly as possible.
  7. Bake for 14 minutes in a preheated 375 degree oven.
  8. Remove from oven and place on rack to cool for 20 minutes then carefully remove cheesecakes from pan and let cool completely on rack.
  9. Put cheesecakes in refrigerator and chill until ready to use.
  10. Just before serving, combine cream (make sure it’s very cold), grand marnier and sugar in a mixing bowl and whip, using a hand whisk or electric mixer with whisk attachment, until soft peaks form.
  11. Top mini cheesecakes with dollops of grand marnier cream and serve.
  12. Enjoy!

Orange You Glad it’s Friday?

By - No comments:
orange-juice-for-web-2.jpg
One of my favorite things about winter is fresh-squeezed orange juice! I’ve been lucky in that I’ve spent many years of my life surrounded by orange trees. Growing up in California, we actually never had an orange tree of our own but the thing about living in the San Joaquin Valley is that even if you don’t have an orange tree, you always know several people who do! Well it’s been several years since I’ve lived in California but now here I am in Sicily, surrounded by orange trees once again, and I’m loving it!
There’s just something about the smell of a freshly peeled orange that will brighten my mood even on the worst days. And since I spent December and part of January suffering through a terrible bout of insomnia, these oranges have really had their work cut out for them! I’ve been juicing them in the morning, snacking on them during the day and adding them to green salads in the evening. I even served my latest orange salad creation at Christmas dinner. And since it seemed to be a hit then, I decided to share it with you!
Thanks to my cousin Corinne for helping me figure out the salad dressing recipe once and for all! Here it is:
orange-salad-for-web-3.jpg
Orange Cranberry Salad with Walnuts and Blue Cheese
Salad:
1 head Butter, Boston or Bibb lettuce
4 oranges, peeled and sectioned
handful of sweetened, dried cranberries
handful of toasted walnuts
crumbled blue cheese
Dressing:
4 T. fresh orange juice
1 T. white wine vinegar (or anything you have on hand)
1 clove garlic, minced or pressed
4 T. olive oil
pinch of salt
freshly ground black pepper

Calorie-free Cheesecakes!

By - No comments:
aois-cheesecakes-with-black-border-crop.jpg
I am one of those people whose refrigerator is completely covered with magnets, photos, etc. I’ve been this way for as long as I’ve had my own kitchen and I’ll probably never change. In fact, I had my first refrigerator magnet before I even moved into my first apartment. I moved to Oregon with my friend Stephanie when I was 19 years old. We packed up three vehicles and drove up to Portland from California. Stephanie drove her truck, I drove my Oldsmobile, and my parents drove my mom’s little Toyota pickup. On the way up, we stopped off in Corning, CA at a place called The Olive Pit for lunch. Actually, Steph and I ate at Burger King next door because at the time, the idea of an “olive burger” didn’t sound too appealing to us. By my mom and dad went to the Olive Pit and most likely had a much better lunch than we did! My mom also made a secret purchase in there and when we got to the new apartment in Portland later that night, I was given my first refrigerator magnet, a souvenir from Corning featuring a little mouse hugging a huge olive that said, “Olive you.”
olive-you.jpg
The magnet is old, stained, and chipped now but here it is 13 years later and it’s still on my fridge, and it’s still my favorite! Looking at this magnet instantly brings back all the memories of moving out on my own for the first time: the excitement, the fear and the sadness that goes along with moving so far away from everyone you love and everything you know.
Pretty much all of the magnets on my fridge come with some sort of story or memory. Many have been given to me as gifts. Some of them I’ve purchased for myself just because I think they’re funny, some of them were picked up as souvenirs of our travels through Europe, and some of them came from my mom’s refrigerator when she died. Someday maybe I’ll write more about them because in a way, they tell the story of the last 13 years of my life. But today, I am only going to talk about one more thing…my latest magnet purchase that has moved up into second place in my long list of favorites!
david-and-magnets-with-black-border.jpg
Yes, I’m finally getting to those delicious-looking little cheesecakes that made you start reading this post in the first place! These beautiful, tiny, delectable cheesecake magnets were custom-made by a very talented artist who just so happens to sell all kinds of miniature, calorie-free food creations online at her etsy shop. I sent her a photo of my own mini cherry cheesecakes and a couple of days later she had handcrafted these beautiful little magnets for me. I ordered five of them but I can’t help giving them away to friends and family so I will have to order more soon. I can’t say enough about the quality of her work and the wonderful customer service! So, next time you need to buy a gift for your favorite foodie, head over to Aoi’s Art and pick out one of her original creations or let her create a custom piece just for you.

I Dreamed of Broccoli

By - No comments:
organic-produce.jpg
No, really I did! Of course it was only a daydream, but that daydream led to my new favorite roasted broccoli recipe that I plan on sharing with you once I get through telling my silly story. I was at the gym, on the elliptical machine, listening to Bob Marley on my new ipod shuffle (I know, I probably wasn’t moving very fast while listening to that), when all of a sudden I drifted off and started daydreaming about the broccoli in my fridge. Some friends and I had visited our little organic market the day before and although pickings were slim because we showed up later than usual, I did get a very nice looking bunch of broccoli, some carrots (dirt and greens still attached), lemons, and blood oranges. Now, why it was that I didn’t dream of the citrus fruit or the carrots that day at the gym, I’ll never know. But I just couldn’t stop thinking of that broccoli. Who daydreams about broccoli at the gym??
I had been planning on using the broccoli for either a quiche or some soup but all of a sudden I couldn’t stop thinking about eating the broccoli by itself. I just wanted to go home, steam it, and eat it. All of it. But then my broccoli daydream got a little more interesting. I started thinking about roasting it. I love roasted broccoli! But the recipe I’ve used lately for roasted broccoli includes so many heavy seasonings that you can hardly taste the vegetable. You see I usually douse it in olive oil and toss it with tons of chili powder, garlic and whatever else I feel like throwing in the mix, then roast it until just tender (have to give Rachael Ray credit for that). It always turns out great but this time I was craving broccoli, not chili powder.
So there I was, still on the elliptical machine, listening to Yusuf Islam (still not moving very fast) and I start thinking that maybe instead of dumping tons of spices on the broccoli, I could add a subtler flavor by seasoning the oil with some fresh garlic. That was it! Once my brain seized on that idea, I couldn’t stop thinking about it. Fresh broccoli spears tossed with garlic oil, salt and fresh ground pepper, roasted until crispy on the outside and just tender on the inside. It sounded so good that I ended up hopping off the machine a few minutes early (broccoli seems like a good excuse to cut a workout short!) and heading home. On the way home, I kept thinking about the recipe and by the time I got here, I had decided that lemon juice and parmesan cheese would make it even better without overpowering the broccoli too much.
So, I heated some oil in a saucepan, threw in a couple of smashed garlic cloves and let it cook slowly over low heat while I started washing and cutting up the broccoli. At the last minute, I decided that some heat would make the recipe even better so I threw a pinch of crushed red pepper into the garlic oil and let it cook for another minute or so.
chili-garlic-oil.jpg
Next, I strained the chili-garlic oil into a large mixing bowl, tossed in the broccoli flowerets, squeezed the juice of half a lemon on top, added a pinch of salt, several grinds of black pepper and tossed and tossed and tossed until all of the broccoli was coated with the oil and lemon. Then I spread it out in a single layer on a baking sheet and put it into my preheated 425 degree oven. While it was in the oven, I found my microplane and grated up a little pile of Parmigiano Reggiano.
parmigiano-reggiano.jpg
After 10 minutes or so, the broccoli was nice and crispy on the bottom and just barely tender, which is how I happen to like it. I dumped it all back into the bowl, sprinkled the cheese on top, tossed again and then ate it. All of it.
roasted-broccoli.jpg
No, it’s not normal for me to daydream about vegetables at the gym. I think it might have something to do with the fact that I’ve been eating almost nothing but grilled cheese sandwiches for the last week or so. My body needed something green! But it’s true that for the last year now, my head is constantly filled with new recipe ideas and once I get something in my head, I can’t stop thinking about it until I write it down or try making it.
I usually end up scribbling things down on whatever piece of paper I can find. Of course I generally lose these scraps of paper before I get around to doing anything with them. But if it’s a good idea, it will usually come to me again. This broccoli recipe ended up being written on the envelope of my friend’s wedding invitation (sorry Dustin and Elisa) because for some reason, all of the 20 pads of paper that I own have migrated upstairs and been lost in the Bermuda triangle of paperwork that we like to call our home office. I usually write the recipe as I’m cooking and then while I’m eating, I read it over and make corrections. I always try making it again using my written recipe, to make sure that it works. Usually it does, but sometimes I have to revise it a few times. For something as simple as roasted broccoli, I probably don’t need to test the recipe before publishing it on here but I did it anyway because it’s really good (even for breakfast, as I found out this morning)
Oven Roasted Broccoli with Lemon, Chili-Garlic Oil and Parmesan
1 bunch of broccoli
¼ C. extra virgin olive oil
2 cloves garlic, smashed
¼ t. crushed red pepper (optional)
Juice of ½ lemon
Kosher salt
Fresh ground pepper
Fresh grated Parmigiano Reggiano
  1. Preheat oven to 425 degrees.
  2. Heat the oil and garlic in a small saucepan over low heat. Make sure the heat is low and that the garlic is not cooking too fast. Set timer for five minutes.
  3. While garlic oil is heating, wash and cut your broccoli into pieces. I cut the flowerets into halves and/or quarters and leave a couple inches of stem attached to each piece.
  4. After the oil and garlic has heated for five minutes (the garlic should be turning golden brown, not burning!), add the crushed chili if using, heat for an additional minute then turn off stove.
  5. Strain chili-garlic oil into a large, heat-proof mixing bowl then add the broccoli.
  6. Squeeze the juice of half a lemon into the bowl then add a pinch of coarse salt (keep in mind that the cheese will add more saltiness) and several grinds of black pepper (if you don’t have a pepper grinder, why not??).
  7. Toss everything together well with a big wooden spoon so that each piece of broccoli has a thin coating of oil.
  8. Using tongs, so that the excess oil drains off, remove the broccoli to a rimmed baking sheet and spread it out in a single layer.
  9. Place broccoli in a preheated 425 degree oven for about 10 minutes. If your oven tends to be hot, check the broccoli earlier. If you like it to be extra tender, leave it in longer. At 10 minutes, the broccoli will have started to caramelize on the bottom and may even look a little burnt but don’t worry, it will taste good!
  10. While the broccoli is roasting, grate some fresh Parmesan cheese (I prefer parmigiano reggiano).
  11. When the broccoli is done to your liking, immediately toss it with as much cheese as you desire and enjoy!

Creamy Roasted Cauliflower and Artichoke Soup

By - No comments:
creamy-cauliflower-and-artichoke-soup.jpg
Well, after all my talk about the warm, sunny days we’ve been having around here, the skies are now gloomy and overcast. It’s still not very cold but the dreary weather makes me crave something warm and comforting. And since my husband won’t be home for a while yet, I settled for some soup.
My original intention was to make the cream of artichoke soup featured on the Castroville Artichoke Festival Web site. I had a bunch of little artichokes in the fridge and I thought it would be an interesting way to use them since I had never tasted artichoke soup. But then I realized that I also had an entire head of cauliflower tucked away that I had been saving for soup.
Hmmmm. Guess what I did?
Of course I ended up throwing everything together and creating a completely different kind of soup.
I’ve been wanting to roast some cauliflower ever since I wrote about the roasted broccoli. And, after seeing a few creamy cauliflower soup recipes around, I was inspired to try a creamy roasted cauliflower soup. But then I read about the creamy artichoke soup and I couldn’t let that idea go either. Yes, I have a thing for creamy soups and, well, creamy things in general. Here’s what I ended up doing:
I boiled my artichokes in water with some lemon juice, bay leaves and peppercorns thrown in.
artichokes-in-pot.jpg
Then I cut them in half and removed the hearts. Instructions for preparing artichokes can be found here.
cut-artichokes.jpg
In the meantime, the cauliflower had been roasting away in the oven.
roasted-cauliflower.jpg
It turns out that Roasted cauliflower and artichoke hearts taste pretty good all blended up together with a little cream, lemon zest and thyme (but really, what doesn’t taste good blended with cream, lemon zest and thyme?).

Creamy Roasted Cauliflower and Artichoke Soup
1 head cauliflower
extra virgin olive oil
1 C. artichoke hearts (I cooked my own but you’re welcome to try canned)
2 or 3 cloves garlic, minced
4 C. vegetable stock (or substitute chicken broth or plain water)
1 C. light cream (or half and half, whole milk, or even heavy cream)
zest of one lemon
leaves from a few sprigs of fresh thyme, crushed
salt
fresh ground black pepper
  1. Preheat oven to 425 degrees.
  2. Wash cauliflower then cut into flowerets.
  3. In a large bowl toss cauliflower with enough olive oil to lightly coat all the pieces then spread them out in a single layer on a rimmed baking sheet.
  4. Place cauliflower in a preheated 425 degree oven and roast, turning pieces occasionally until almost tender (between 20-30 minutes)
  5. Remove cauliflower pieces to a bowl with tongs; set aside. There should be some olive oil left on the baking sheet. Very carefully pour the leftover oil into a soup pot or dutch oven.
  6. Add minced garlic to the oil in the pot and sauté over medium heat until just golden.
  7. Add cauliflower, artichoke hearts and vegetable stock to the pot and bring to a boil. Turn heat way down and simmer for a few minutes until cauliflower is fully tender (check with fork).
  8. Remove pot from heat and let cool slightly. Puree the soup until smooth using a food processor, blender, or immersion blender. Return to pot.
  9. Gently reheat soup then add one cup of light cream, zest of one lemon (not juice), crushed thyme, and lots of salt and fresh ground pepper to taste. Soup can be thinned with extra broth or water if desired. Remove from heat when soup is heated through again.
  10. Enjoy!

A Sunday Cappuccino

By - No comments:
cappuccino-on-sunday.jpg 

Although nothing can replace the experience of enjoying a cappuccino with good friends at your favorite bar (or local Starbucks, if you don’t happen to live in Italy), sometimes it’s just as nice to sink down into your favorite chair, cradling your favorite green cup, savoring the smell of freshly brewed espresso that has filled the entire downstairs of your house, admiring your creation — the perfect, creamy froth, the faint dusting of cocoa powder just clinging to the edge of the cup, waiting to be swept into your mouth with the first sip, the heat from the cup warming your hands as you know it will also warm first your mouth, then your throat, and then your entire body as a sense that maybe your life isn’t so bad after all slowly takes hold of you. And then you take the first sip.

Happy Carrot-Ginger Soup Day

By - No comments:
Carrot Ginger Soup 


So, what does Carrot-Ginger Soup have to do with Valentine’s Day? Absolutely nothing. I had been planning on posting this soup recipe a week ago, along with some Whole Wheat Cheddar Onion Muffins that I have been working on. But, it just didn’t happen. I’m happy that the Naughty Ice Cream Sandwiches were such a hit because it makes me feel a little less guilty about my little two week break!
Actually, I lied, I don’t feel guilty at all. There’s a reason why I’ve been distracted for the last couple of weeks. Today was supposed to be a pretty big day. Yes, it’s Valentine’s Day and all that but I’m not really into making a big deal out of Valentine’s Day. It was going to be a big day this year because my husband, who has been serving in Iraq for half a year, was scheduled to come home today. Finally, I thought, an end to the non-stop worry and fear, an end to the loneliness, and, most importantly, an end to the insane amount of stress that he’s been under. Well, you’ve probably already figured it out, but I’ll tell you anyway. The end isn’t here. And, as I found out a couple of weeks ago, the end is no longer in sight. He’s been extended in Iraq and this Valentine’s Day has turned back into an ordinary day, a soup day.
I shouldn’t have used the words ‘ordinary’ and ‘soup’ in the same sentence because this Carrot-Ginger Soup from Veggie Cookbook, while easy to make, was far from ordinary. It’s one of the best new soups I’ve tried in quite some time!
I had a ton of organic carrots in the fridge and two ideas of what to do with them. First, I wanted to create a new whole wheat carrot muffin recipe (I’m still working on that one) and second, I wanted to make some carrot soup. I’ve seen some great carrot soup recipes around lately but when I saw this recipe at my new favorite vegetarian food blog, I knew I had to try it! Although it’s unusual for me to strictly follow a recipe these days, I made this soup exactly as instructed and I’m really glad I gave the original recipe a chance.
What really sold me on this recipe, and made this different from other carrot soup recipes I’ve seen, was the addition of ground coriander, and especially the idea of serving it with fresh lime juice and fresh coriander (cilantro). Serve me anything garnished with lime and cilantro and I’m happy!
So, I highly suggest head over to Veggie Cookbook for the soup recipe and while you’re there, make sure you check out what else she has to offer!
And while we’re on the subject, here are a couple other carrot soup recipes that I would love to try soon:
Check back soon for the new whole wheat muffin recipes, I’ve got some really great ones in the works!
And finally, I’d like to end this on a serious note. Today is a day when people who are in a relationship feel pressured to go overboard to prove their love through showerings of silly, and often ridiculously expensive, heart-shaped gifts while those who aren’t in a relationship feel shunned by a culture that still places so much importance on being part of a couple. Some couples will probably get in fights today because one of them didn’t do enough to prove their affection while some single people are sitting at home crying because today is nothing but one giant reminder that they are missing out on everything in life because they haven’t yet found Mr. or Ms. Right. And what I’m writing isn’t going to change any of it. But, for a minute, can we stop and think about the fact that people all over the world, right now as you’re reading this, are dying. Women are losing their husbands, men are losing their wives, children are losing their parents and perhaps worst of all, parents are losing their children. What is most important is not that you remember to buy big presents for the ones you love. What is important is that they know how you feel every day. Because in this world, you never know which day will be the last. We all have someone to love, whether it’s a parent, child, friend, or lover. Call them today and let them know.
Please, by all means, celebrate love. But remember to do it every day.

Naughty Ice Cream Sandwiches

By - No comments:
sandwich-for-web.jpg
For an extra special Valentines Day treat, create these decadent and elegant ice cream sandwiches for the one you love. Combining Kahlua-flavored dark chocolate chunk brownies and ice cream spiked with Bailey’s, these aren’t your children’s ice cream sandwiches!
I created this dessert especially for a Four Weeks Magazine article that highlights five proven aphrodisiacs and includes five aphrodisiac recipes. I managed to squeeze three of the five listed aphrodisiacs into this dessert: coffee, dark chocolate, and alcohol; so beware of this one ;-) There are four other recipes featured in the article from some of my favorite foodbloggers. Two that look very promising are a Double Chocolate Tiramisu for Two created by the lovely Ivonne of Cream Puffs in Venice and a Dark Chocolate Layer Cake with Chocolate Rum Cream Cheese Frosting from Rachel of Coconute & Lime fame. Wow! Read the article here to see the recipes for yourself.
This recipe is far from difficult but it does require a little planning and preparation. For best results (and no stress), prepare the ice cream and bake the brownies the night before, assemble sandwiches in the morning, and serve as a surprise to your sweetheart after a romantic Valentine’s day dinner.
heart-shaped-brownies-for-web.jpg

heart-shaped-brownies-2-for-web.jpg
Naughty Ice Cream Sandwiches
Prepare the filling:
½ Gallon of premium vanilla ice cream, softened but not melted
¼ C. Irish Cream liquor (I used Baileys)
  1. Line a jellyroll pan with plastic wrap.
  2. In a large bowl, stir together the softened ice cream and Irish Cream until well combined.
  3. Spread ice cream evenly in the jellyroll pan. Cover with plastic wrap. Freeze for several hours or overnight.
Prepare the brownies:
1 full-size box of brownie mix
2 eggs
½ C. oil
¼ C. coffee-flavored liquor (I used Kahlua)
2 T. instant espresso
1 t. vanilla
4 oz. dark chocolate, cut into small chunks
  1. Preheat oven to 350 degrees. Lightly grease an 18”x13” jellyroll pan then line the bottom with parchment paper.
  2. In a small bowl, combine Kahlua, instant espresso and vanilla; stir until coffee is dissolved.
  3. In a large bowl, combine brownie mix, eggs, oil, and Kahlua mixture; stir together until well combined.
  4. Stir in chocolate pieces.
  5. Pour mixture into the jellyroll pan and, using a spatula, gently coax the mixture out to the edges of the pan. Once the mixture has been spread as evenly as possible, smooth the top with a spatula.
  6. Place pan in a preheated, 350 degree oven. Bake for 12-15 minutes.
  7. When brownies are done to your liking (12 minutes for gooey, 15 for well-done), remove from oven and let cool completely on a wire rack.
Assemble the sandwiches:
Cut brownies into heart shapes using a cookie cutter. Use a spatula to carefully lift and remove the cut brownies to a separate platter. After all the hearts have been cut, cut the remaining pieces of brownie into bite-size pieces and store in a plastic bag for nibbling later. Wash and dry jelly roll pan then spread the brownie hearts out in a single layer in the pan.
Next, clear a large area on the counter and remove ice cream sheet from freezer. Place the tray of brownies within easy reach. Remove top layer of plastic wrap from ice cream. Working quickly, cut ice cream into shapes using the same cookie cutter you used for the brownies. As soon as you cut a piece of ice cream, quickly remove it by pushing up from the bottom with your fingers. This will get messy. Place the ice cream shape on top of one brownie and cover with another brownie. If desired, repeat this process to create a double decker sandwich. Continue until all brownie pieces have been used up.
Cover pan of sandwiches with plastic wrap and immediately place in the freezer. Scoop remaining bits of ice cream into a plastic container and freeze for later (you can eat it with the extra brownie pieces). After about an hour, the sandwiches can be individually wrapped in plastic if desired.
Ice cream sandwiches can be eaten by hand straight out of the freezer or for a special occasion, mix a little Kahlua with store-bought chocolate syrup, drizzle on a plate and top with the ice cream sandwich. You could even add a dollop of whipped cream!

Carpaccio di Arance e Olive Verde

By - No comments:
blood-orange-snack-for-web.jpg
I made this simple salad of blood oranges, green olives and olive oil for a snack the other day and it was so beautiful that I couldn’t help but take photos of it. I’ve had the photos posted on Flickr for a couple of days now but I hadn’t planned on writing about it here. It’s so simple that I really didn’t think of it as a recipe. But, I am absolutely head over heels in love with this photo and the taste of this dish was spectacular. So, even though there isn’t much to it, I’ve decided this is definitely a recipe worth sharing.
Within a week of arriving on the island, I had received my first Sicilian recipe. We were on a tour bus heading through the countryside towards some destination that completely escapes me now and our tour guide was giving us information about the orange groves that we were driving past. He mentioned that if anyone wanted to pull him aside later, he would share a recipe for a Sicilian orange salad. Of course I grabbed him the first chance I got and scribbled down the recipe on my little yellow notepad. It was a very simple orange salad. The ingredients were only sliced oranges, fresh garlic, fresh parsely, and olive oil. To be honest, I thought it was one of the strangest recipes I’ve ever seen. I grew up in California eating fresh oranges every winter but I had never heard of anyone eating an orange with garlic and olive oil. In fact, we never really did anything with oranges other than peel them by hand and eat them or juice them. But I was completely fascinated by the recipe and the first time I tried oranges paired with olive oil, I was hooked.
Well now I am constantly trying new salads that involve oranges and olive oil and if you’ve been browsing through any other food blogs lately, you might have noticed that lots of other people are exploring this combination as well. If you want something a little more complex than I am giving you today, there are tons of citrus salads floating around the blogosphere right now. And a favorite orange and fennel salad that I tried recently can be found at Food “Blogga.”
But if you are new to eating oranges this way, this recipe is a simple and beautiful way to start:
Blood Orange Carpaccio with Green Olives
Blood orange slices
Green olives (preferably oil cured)
extra virgin olive oil
salt
  1. Peel and section oranges with a sharp knife, leaving the pith and membrane behind. Cut thicker slices in half if desired.
  2. Arrange orange slices on a plate, drizzle with olive oil, then add a sprinkling of coarse salt.
  3. Scatter some green olives over the plate and serve.
And I must thank my friend Aoi for naming this dish after she saw the photos on Flickr :-)

Easy Egg Salad for Easter Egg Overload

By - No comments:
sandwich-on-plate.jpg
It’s that time of year when many families with children find that their baskets and refrigerators runneth over with hard-boiled eggs. What to do with them all?! My favorite solution to the problem has always been deviled eggs, but today I am going to share with you my second favorite. Egg Salad Sandwiches! I love egg salad and as far as I’m concerned, the simpler the recipe, the better. Some things in life are not meant to be fooled around with and I believe that egg salad is one of those things. So, you will find nothing fancy in my egg salad and I’m pretty sure you’ll like it that way too! I learned to make it this way from my mother-in-law Sharon, who makes the most amazing egg salad but curiously, won’t eat it herself.
This recipe uses mustard powder rather than prepared mustard, and if you use enough, the salad will have a little bite. Feel free to add more mustard powder than the recipe says if you, like me, enjoy just a bit of that hot mustard burn. If not (wimp), just follow the recipe instructions, and you’ll have a nice, mild, creamy, eggy experience. Also, try using a pastry blender to chop your eggs…you won’t believe you actually used to chop them all by hand!
Update: To learn how to make perfect hard-boiled eggs, head over to Kalyn’s Kitchen for instructions and more hard-boiled egg recipes!
chopping-eggs.jpg
Easy Egg Salad
4 hard-boiled eggs, peeled
1/4 – 1/2 C. mayonnaise
1 – 2 t. Coleman’s mustard powder
salt and freshly ground pepper, to taste
  1. Place whole eggs in a bowl and, using a pastry blender, mash eggs until they are finely chopped.
  2. Add 1/4 C. mayo and 1 t. mustard powder then stir to blend. Taste and then adjust amounts of mayo and mustard powder to suit your own taste.
  3. Season well with salt and pepper.
  4. Serve on your choice of bread.
Yield: enough for two sandwiches

sandwich.jpg

Nando’s Chicken Pizza

By - No comments:
top-photo.jpg
How it is that I’ve gone this long without tasting any of Nando’s Peri-Peri sauces, I will never know. But now that this wrong has been righted, I’m definitely a Nando’s convert. I like spicy foods and I like hot sauces but I wouldn’t call myself a connoisseur. I always have a supply of a couple different Tabasco sauces on hand (I’ve also tried Texas Pete’s and Louisiana brands but I’ve always been a Tabasco girl), but my pantry hot sauce collection doesn’t usually get much bigger than that other than maybe some Cholula and a mild tomatillo-based green sauce. And of course, there’s the occasional Asian chili paste and I am now always fully stocked with Italian chili paste (crema di peperoncino). But really, considering the variety of hot sauces available in this world, my tiny collection doesn’t even scratch the surface.
I had never even heard of the Peri-Peri pepper (also known as the Pili Pili, Piri-Piri or African bird’s eye pepper). My chili pepper knowledge just doesn’t really go beyond jalapeños, habañeros and the Italian peperoncini that I’ve become totally addicted to since living in Southern Italy. But now that I’ve tasted a few of Nando’s sauces, I want more Peri-Peri! I’m curious to know how many of you are already using Nando’s sauces or perhaps have even eaten at the restaurants. Apparently I’m one of the few who had never heard of Nando’s! I mean Oprah, Ricky Gervais, and Nelson Mandela are all fans…where have I been?? Oh yeah, in Sicily. :-)
But if you haven’t yet tried the sauces, it seems that they are widely available in stores. The Nando’s Web site has a nifty little store finder to help you find one close to you. And if, like me, you can’t get the stuff in a store, the sauces can easily be ordered online!
So, here’s what happened. I got a nice e-mail from Dave over at Nando’s Peri-Peri asking me if I would like to taste some of their sauces and maybe review them on Pinch My Salt. At first I was a little skeptical of accepting the free sauces. I was torn between really really wanting to get free stuff in the mail and not wanting to feel obligated to write a review for a product that I might not even like. So, I didn’t respond at first. But then I did a little research on the Peri-Peri pepper and finally curiosity got the better of me. I wrote to Dave and told him that I would love to try some of the sauces but that I wouldn’t review them unless I was really impressed with the product. Dilemma solved.
When I got the package in the mail, I was excited to see that I received not one but three different sauces to try! One was a big jar of Roasted Red Pepper Cooking Sauce (mild), one jar of Garlic Peri-Peri Sauce (medium), and a jar of Peri-Peri Marinade (hot). I wasn’t so sure about the cooking sauce and marinade because I’ve tried to get away from store bought sauces but when I opened the jars and tasted each one, I must say that I was really impressed with all three!
So, here’s my review for all of the Nando’s sauces: YUM! Go get some now!
Ok, now that the review part is out of the way, let’s move on to what I do best…creating recipes, cooking, and eating!
A very strange thing happened in the moment I tasted the Roasted Red Pepper Cooking Sauce, I knew exactly what I wanted to do with it. I think it was the first time that a single taste of a new ingredient instantly inspired an entire recipe! I immediately knew this slightly sweet, slightly spicy, mouth-wateringly tangy sauce would taste great on a pizza and I knew for certain that the pizza should be covered with cheese, grilled chicken, pineapple, and fresh cilantro. I just knew.
I don’t make pizza at home very often because I live in Sicily and I can go out and get really good pizza anytime I feel like it. Since I don’t have a wood-fired pizza oven, nothing I make at home will compare to the pizza here I can get here. But this pizza would be different. I wouldn’t be trying to replicate a Sicilian pizza. It would be my very own Nando’s Grilled Chicken Pizza and I couldn’t wait to taste it!
For the pizza dough, my trusted recipe comes from one of my favorite cookbooks, Deborah Madison’s Vegetarian Cooking for Everyone. It uses both white and whole wheat flours and I think the flavor is the best of any pizza dough I’ve tried. For the grilled chicken, I marinated chicken breasts in Nando’s Hot Marinade before grilling them. I would have preferred to grill some fresh pineapple for this pizza but the pineapple at the store near me was just too expensive. Crushed pineapple worked fine (make sure to drain it well) but I will definitely try grilling some pineapple next time.
I have a pizza/baking stone in my oven and I highly recommend using one if you want great pizza from home. Put the stone on the bottom shelf in your oven and preheat it to 500 degrees. With the stone, you need to allow lots more time for the oven to come to temperature. I usually let it preheat for a full hour. And if you’re going to use a baking stone, you’d better invest in a baker’s peel too! Ok, now you’re ready to bake some pizza!
Nando’s Spicy Grilled Chicken Breasts:
  • 4 boneless skinless chicken breasts, pounded to a uniform thickness
  • Nando’s Peri Peri Hot Marinade
  • salt
  • fresh ground pepper
Place chicken in a shallow container and pour on enough marinade to evenly coat all sides of the chicken pieces. They don’t have to be swimming in marinade, just make sure all pieces are coated on both sides. Cover with plastic wrap and let sit in the fridge for a minimum of 30 minutes. Preheat grill. Remove excess marinade from chicken pieces, season both sides with salt and fresh ground pepper. Place chicken over direct medium heat and cook about 6 minutes per side or until thoroughly cooked. Remove to a platter and let cool. When cool enough to handle, slice into bite size pieces and set aside for use on pizza or cover and refrigerate until ready to use.
Pizza Dough:
  • 1 1/2 C. warm water (NOT hot water)
  • 2 t. active dry yeast (I use instant yeast)
  • 2 T. extra virgin olive oil
  • 1 1/2 t. salt
  • 1 C. whole wheat flour
  • 3 C. all-purpose flour plus extra for kneading
In a medium bowl, mix yeast with the cup of whole wheat flour. Add water and oil and stir to combine. In a separate bowl, stir salt into the remaining flour and then add flour to the wet mixture, a little at a time, stirring, until a shaggy dough is formed. Turn the dough out onto a floured counter or board and knead with well-floured hands until smooth (about 5 minutes should do it). The dough will be sticky but try not to add too much extra flour, a moist dough will result in a lighter crust.
Put the dough into an oiled bowl and turn once to coat the dough with oil. Cover with a towel and set aside in a slightly warm place (on top of the fridge is usually good) for about an hour or until the dough has doubled in size.
Turn the dough out onto a counter and cut into four equal pieces. Shape each piece into a ball, place them on a lightly floured surface, then cover with a towel. Allow to rest for another 30 minutes.
Shape the dough: Place a large piece of parchment paper on your work surface and dust it lightly with flour. Working with one piece at a time, and using floured hands, press the dough into a disc and then starting from the center, push the dough out using your fingers and the heel of your palm, trying to keep the circle as uniform as possible. Make sure the dough is not sticking too much by lifting and turning it occasionally and sprinkling extra flour as needed. Flatten dough until it is about 1/4 inch thick (or even thinner if you can manage it). Make sure to leave a rim along the outside that is slightly thicker than the middle. You should end up with a pizza that is approximately 10” in diameter.
Cover and let rest for 10 minutes before adding the toppings. Start rolling out your next crust while the first one is resting. If you are not planning on using all four crusts, wrap the extras loosely in plastic wrap and store in the refrigerator overnight. When you are ready to use it the next day, take it out of the fridge and let it sit at room temperature for at least 30 minutes before rolling it out. If you want to store the dough longer than overnight, wrap it well and freeze it.
pizza-dough.jpg
Pizza Toppings:
  • Nando’s Peri-Peri Roasted Reds Cooking Sauce
  • Nando’s spicy grilled chicken breasts, chopped
  • Crushed pineapple, drained well
  • Shredded mozzarella cheese
  • Shredded cheddar cheese
  • Fresh cilantro, chopped
Now for the fun part! The amount of toppings is completely up to you:
pizza-sauce.jpg
Spread a few spoonfuls of Nando’s Peri-Peri Roasted Reds Cooking Sauce evenly over the pizza dough. Next, sprinkle drained crushed pineapple over the sauce. Add shredded mozzarella and cheddar, chopped grilled chicken, and a little more pineapple. Top with a few extra sprinklings of cheese.
Slide pizza peel under the parchment paper and then slide pizza and parchment directly onto a hot baking stone in a preheated 500 degree oven. Bake for 8 – 10 minutes, until crust is very well browned and pizza is bubbly.
Sprinkle fresh chopped cilantro liberally over the pizza, then cut and serve!
pizza-with-cilantro.jpg
I would like to thank Nando’s for giving me the chance to try out these wonderful sauces! My next post will feature one more Nando’s recipe…Honey Garlic Wings featuring Nando’s Garlic Peri-Peri Sauce so stay tuned for part two! But until then, you can check out a couple other Nando’s reviews by my friends Curt over at Bucky’s Barbecue Blog who tried out the sauces with some smoked chicken thighs, and Kristen at Dine and Dish, who reviewed Nando’s Curry Coconut Sauce…YUM!

Nando’s Honey Garlic Wings

By - No comments:
nandos-honey-garlic-wings-2-for-web.jpg
This is a continuation of my previous review of Nando’s Peri Peri Sauces. I had three sauces to try out–Roasted Reds Cooking Sauce, Peri-Peri Marinade, and Garlic Peri-Peri Sauce. I used the first two sauces in my chicken pizza, but I had different plans for the Garlic Peri-Peri Sauce. It seemed like the sauce might be good on some chicken wings, so of course I tried it out. Guess what? It was good on chicken wings :-)
I had never cooked chicken wings before but I decided I wanted to grill them rather than fry or bake them. So, I turned to my favorite book on grilling, Elizabeth Karmel’s Taming the Flame. Sure enough, she had instructions for grilled Buffalo-Style Chicken Wings. I adapted the recipe a little but definitely can’t take credit for creating this one!
I used a bag of frozen chicken drummettes, but you’re welcome to use whole wings if that’s what you prefer. This recipe uses a combination of indirect and direct grilling, If you don’t understand the difference, read this before you get started. I didn’t give exact amounts of seasonings, just use your best judgment :-)
Nando’s Honey Garlic Wings
3 – 4 pounds chicken drummettes
olive oil
garlic powder
salt
pepper
4.7 oz. bottle Nando’s Garlic Peri-Peri Sauce

2 T. Butter
2 T. honey
  1. Light briquettes or preheat a gas grill.
  2. Defrost chicken pieces and pat dry with paper towels.
  3. Put chicken pieces in a large bowl; drizzle with olive oil; season with garlic powder, salt, and pepper; stir until all pieces are coated.
  4. Grill chicken pieces, covered, over medium indirect heat for 20 – 25 minutes, turning once halfway through cooking time.
  5. While chicken is grilling, combine hot sauce, butter, and honey in a small saucepan. Bring to a slow boil, whisking occasionally, and reduce heat to low. Season to taste with salt and pepper.
  6. Take 1/3 of the sauce to the grill and brush on the chicken. Grill for an additional 5 -10 minutes.
  7. Remove wings from grill and place in a clean bowl. Pour remaining sauce over the chicken and stir until they are well coated.
  8. Return the chicken to the grill, this time over direct medium heat. Grill for a few minutes on each side until brown and caramelized. Watch chicken carefully because it will burn quickly!
  9. Serve warm with blue cheese dip.
These wings have a little kick but they really aren’t too spicy. But even though these aren’t as spicy as traditional buffalo wings, the Nando’s Garlic Peri-Peri Sauce really gives them a wonderful flavor and I have to say that I enjoyed them as much or more than most wings I’ve had in restaurants and bars. They also got several thumbs up from a group of Sailors here that I recently recruited to be Pinch My Salt taste-testers. Thanks guys!

Herbed Tuna Salad with Feta and Pine Nuts

By - No comments:
chives-and-knife_web.jpg
There’s a weekly food blog event that I have been meaning to participate in for quite some time now. It’s called Weekend Herb Blogging and it’s a great way for people who enjoy using fresh herbs to share tips, ideas, information, and recipes with one another. The event, now on it’s 82nd week I believe, was founded by Kalyn of Kalyn’s Kitchen and is still hosted there the first weekend of each month. During the other three weeks, the event roams around the food blog community, hosted by different bloggers each week. If you wish to participate, simply write a little something about a fresh herb and/or post a recipe featuring fresh herbs. Put it on your blog sometime during the week (any week, every week) and then e-mail the link to the person who is hosting the event. All of the links are compiled and then posted together at the end of the week by the host. Like all food blog events, it’s a great way to learn something new, find recipes, and also discover new food blogs.
Like many Americans, we didn’t eat a lot of dishes featuring fresh herbs while I was growing up. We always had a garden, ate tons of fresh fruits and vegetables, and both of my parents were great cooks. But for whatever reason, fresh herbs just weren’t a huge part of my early culinary experience. Cilantro is probably the first herb that I remember using on a regular basis but that was only for making fresh salsa. I didn’t even know that cilantro was used for anything other than Mexican food!
Well, I’ve come a long way, and spending a few years in Sicily has certainly helped me discover the joys of using fresh parsley, basil, oregano and rosemary. I’ve also discovered that cilantro is widely used in many different cuisines around the world and I now use it all the time. I am growing several different herbs in my backyard and am always trying to find new ways to use them. I currently have rosemary, thyme, oregano, basil, parsley, chives, savory and sage growing in a couple barrel planters in the back. And I generally have fresh cilantro on hand now that I discovered it in an international foods store here (cilantro isn’t a popular herb in Italy so I don’t find it in the open-air markets). But I still have a lot to learn about fresh herbs and I’m looking forward to sharing recipes and learning new things each week from all the other Weekend Herb Bloggers!
The recipe that I am submitting to the event this week is a tuna salad that features two fresh herbs: parsley and chives. My aunt Kathy is the person who turned me on to using fresh herbs in tuna. She likes to put cilantro in hers and so do I but the day I made this, I was fresh out! Parsley has become my go-to herb anytime I want to add a little something extra to a dish, so I threw that in. The chives I added just for the hell of it and the rest of the recipe just came together the way most of my recipes do — from things I happened to have on hand. The great thing about this tuna salad is that it uses very little mayonnaise and, even though I added some feta cheese and pine nuts, I think it’s much better for you than a typical mayo-laden tuna salad. On a whim, I substituted thickened plain yogurt for most of the mayo and it turned out great! I still added a little mayonnaise because I happen to really like it but I think you could leave it out completely and this would still be wonderful.
This tuna salad would be good on bread or in a pita but I’ve discovered that my favorite way to eat this is to scoop it right onto a piece of lettuce, pick it up, and eat it by hand. You can use the small inner leaves of romaine or boston lettuce and make several cute little snacks, or you can fill up a larger piece. And by all means, use a fork if you want to. But I’m warning you, it’s not as much fun ;-)
So, here is this week’s recipe for Weekend Herb Blogging, which will be hosted by Pat at Up the Creek without a PatL. Be sure to check her site at the end of the weekend to find out what everyone else submitted! And if you are interested in participating, you can find the official rules at Kalyn’s Kitchen as well as information about who will be hosting the event in upcoming weeks.
herbed-tuna-salad-on-lettuce_web.jpg
Herbed Tuna Salad with Feta and Pine Nuts
6 oz. can of tuna, drained
1/4 C. plain, thick yogurt*
1 T. mayonnaise
1/4 C. crumbled feta cheese
1 T. chopped fresh parsley
1 T. snipped fresh chives
1 – 2 T. toasted pine nuts**
a squeeze of fresh lemon juice
fresh ground black pepper
4 small to medium leaves of romaine lettuce
  1. In a medium bowl, stir together all the ingredients with a fork.
  2. Spoon salad into the middle of the lettuce leaves, garnish with extra chopped herbs if desired.
  3. Enjoy!
* If your yogurt is runny, line a strainer with cheesecloth, pour in one cup of yogurt and let drain over a bowl for half an hour or so. Measure out 1/4 C. of the thickened yogurt and proceed with recipe.
** Toast pine nuts in a small, dry skillet over medium heat. Shake the pan frequently and don’t leave them unattended, they will toast very quickly! When they start to turn a golden brown, remove nuts to a small bowl and let cool.
Just for fun, here are a few more easy Pinch My Salt recipes that also use chives:  Creamy Blue Cheese Dip with Lemon and ChivesCheddar Chive and Sour Cream Omelette, and Sour Cream, Cheddar and Chive Biscuits.  Enjoy!

Happy Mother’s Day!

By - No comments:
This is an older post but it reminds me of my mom so I decided to re-post it for Mother’s Day. We lost my mom in 1998 but I think of her every day, especially when I’m in the kitchen!
bread-and-cinnamon-for-web.jpg
I’ve been baking bread since I was small. My mom baked bread a lot when we were kids and my sister and I used to have fun helping (dressed in our matching chef’s hats and aprons, of course).
baking-bread-2.jpg
Nicole (Nickle, back then) on the left and Penny and the right.
baking-bread.jpg
At some point, I took things into my own hands and started baking my own bread. Cinnamon Swirl bread, to be exact. For whatever reason, once I learned how to make that, it was the only bread I made for years. It wasn’t until we moved overseas a few years ago that I was bitten by the breadmaking bug (actually, attacked is more like it!). I will never stop making the cinnamon swirl bread but I’ve since branched out into all types of bread from standard whole wheat sandwich loaves to focaccia to sourdough (my latest obsession!).
There is nothing in the world like the smell of bread baking in the oven and nothing more satisfying than cutting into a loaf and knowing that you created it with your own two hands.
cinnamon-swirl-loaf-for-web.jpg
Here is my old standby, from Better Homes and Gardens Homemade Bread Cook Book (1973):
Cinnamon Swirl Loaf
7 to 7 1/2 C. all-purpose flour
2 packages active dry yeast (I use 2 t. instant yeast)
2 C. milk
1/2 C. sugar
1/2 C. shortening (I usually use butter)
2 t. salt
2 eggs
1/2 C. sugar
2 t. ground cinnamon
——————————-
In large mixer bowl combine 3 1/2 cups of the flour and the yeast. In saucepan heat milk, 1/2 cup sugar, shortening and salt just till warm (115 – 120 degrees), stirring constantly to melt shortening. Add to dry mixture in mixing bowl; add eggs. Beat at low speed with electric mixer for 1/2 minute, scraping sides of bowl constantly. Beat 3 minutes at high speed. By hand, stir in enough of the remaining flour to make a moderately soft dough. Turn out on lightly floured surface and knead till smooth and elastic (5 -8 minutes). Shape into a ball. Place in lightly greased bowl, turning once to grease surface.
Cover; let rise in warm place till double (about 1 hour). Punch dough down; turn out on lightly floured surface. Divide in half. Cover; let rest 10 minutes. Roll each half into a 15×7-inch rectangle. Brush entire surface with water.
Combine the 1/2 cup sugar with the ground cinnamon. Spread each rectangle with half the sugar-cinnamon mixture. Roll dough up as for jelly roll, beginning with narrow side. Seal long edge and ends by pinching together. Place, sealed side down, in 2 greased 9x5x3-inch loaf pans. Cover and let rise in warm place till almost double (35 to 45 minutes). Bake at 375 degrees till done, 35 to 40 minutes. (If crust browns too quickly, cover with foil last 15 minutes of baking.) Remove bread from pans and cool on wire racks. Makes 2 loaves.
My favorite way to eat this bread (other than right out of the oven with tons of butter) is toasted with tons of butter!

It’s Strawberry Time!

By - No comments:
strawberries.jpg

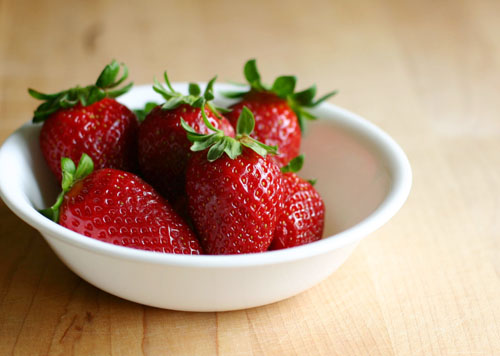
If you’ve had a chance to visit any of the outdoor markets lately, you’ve seen them. Piles of bright red berries, gleaming in the sunlight, just waiting to be taken home and devoured! There are a variety of strawberries here in Sicily, from the impossibly tiny fragoline to the gigantic fragolone, and every size in between. Although strawberries are a wonderfully healthy, low-calorie treat when eaten plain, I look forward to strawberry season for another reason: Strawberry Shortcake!

The strawberry shortcake I grew up eating was assembled using those little yellow sponge cake cups that can be found right next to the strawberries in almost any grocery store in the United States. As a child, I thought those little pre-packaged treats were wonderful topped with strawberries and whipped cream. But after tasting homemade strawberry shortcake for the first time several years ago, I walked away from the little yellow cakes and I’ve never looked back!

aois-cheesecakes-with-small-black-border.jpg

I’ve been experimenting lately with my old shortcake recipe and I’ve come up with a new one that generously serves four people. If you have a large family, double the recipe. Shortcake is best eaten warm from the oven and since this recipe is fairly quick and easy, you can prepare it right before you want to eat it.

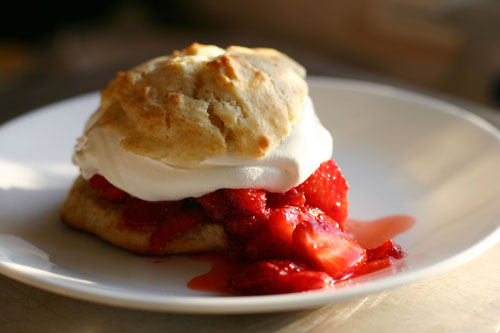
These shortcakes are simply butter-rich, slightly sweet drop biscuits (very close to a scone). And although they may not taste like dessert if you eat them on their own, they are the perfect accompaniment to the sweet strawberries and syrup.

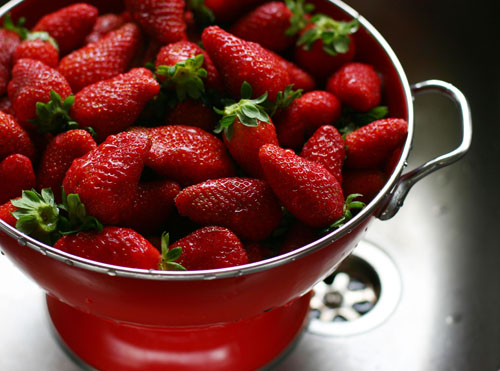
For best results, make sure your butter is very cold and work quickly. Also, be sure to let the strawberry and sugar mixture macerate while you proceed with the recipe as the berries need time to release their tasty juices! For easy clean-up, try lining your baking sheet with parchment paper.

Strawberry Shortcake
4 C. fresh strawberries, rinsed and sliced
4 – 6 T. sugar (adjust to suit your own taste)

1 ½ C. all-purpose flour
1 ½ t. baking soda
4 T. sugar
1/3 C. butter, cut into small pieces
1/2 C. cold milk
1/2 t. pure vanilla extract
whipped cream (I prefer the real thing)
  1. Preheat oven to 425 degrees
  2. In a medium bowl, stir together the strawberries and sugar. Set aside while you prepare the shortcakes.
  3. In another medium bowl, whisk together flour, baking soda, and sugar.
  4. Using a pastry blender or your fingertips and working quickly, cut the butter into the flour until it resembles coarse crumbs.
  5. Add milk and vanilla all at once to flour mixture and stir until just combined.
  6. Using a large spoon, drop mixture into four equal piles on an ungreased baking sheet.
  7. Bake 12 – 15 minutes at 425 degrees.
  8. Remove biscuits to a rack and let cool for a few minutes.
  9. To serve, split a biscuit in two, spoon ¼ of the berry mixture over the bottom half (make sure you include lots of the juice), top with whipped cream and the other half of the biscuit.
More Ways With Strawberries
Last week, I asked for some strawberry recipe contributions to be included in this post. Thanks to everyone who responded, I received some really great ideas!
strawberry_colander_1.jpg
First I’ll start out with a drink recipe given by my friend Ruby. I’ll just let her tell you in her own words how to make this yummy-sounding Strawberry Margarita! Take it away, Rubes!
Well first off you need a good Osterizer blender (much like the one
your Aunt Kathy gave us for our wedding)!
This is a 2 drink recipe that Ron and I use…
wedge of lime and coarse salt to rim the glass!
2 cups of crushed ice
6 cut, fresh strawberries (minus stems)
1/2 shot of lime juice
pinch of coarse salt (optional)
pinch of sugar (optional, depends on how sweet you want it)
1 1/2 shots of tequila (good tequila)
1/2 shot of triple sec
  1. Rub lime on the edges of two margarita glasses and dip in salt (optional)
  2. Blend all ingredients to a fine puree.
  3. Divide drink mixture between the two glasses
  4. Garnish with a strawberry and you have achieved total yumminess!
Moving on…
Veronica from La Recette du Jour gives us a recipe for Strawberries Romanoff, a recipe she says is good for enhancing early-season, dull-tasting strawberries.
Next up, Sara from The Kitchen of San Lorenzo submitted the simple but elegant Strawberries with Balsamic Vinegar.
Then, Terry from Blue Kitchen chimed in with a sweet and tangy salsa recipe that stars both mangoes and strawberries! You must head over there and check out the Spicy Salmon with Mango Salsa!
Melody from Fruit Tart answered my request for Strawberry Pie recipes with her beautiful and rustic Strawberry Rhubarb Pie. In her own words, “This is ‘farm food’. It isn’t fancy gourmet stuff. This is the simple, rustic, real thing.”
Alanna from A Veggie Venture was way ahead of me when it came to rounding up strawberry recipes! She wrote about three of them — Strawberries in Wine, Strawberry Banana Chocolate Crumble and Strawberry Fool — in her Kitchen Parade Article.
Anne from A Foodie Froggie in Paris (I just love the name of her blog!), was also generous with her strawberry recipes! First there’s the Strawberry and Raspberry Tiramisu. And as if that’s not enough, she gives us two more — Strawberry Soup and Strawberry and Mango Tartare with Orange Blossom. Wow!
Mary from the aptly titled blog, Sweet Mary, gives us another unbelievably gorgeous, lattice-top Strawberry Rhubarb Pie. It’s beautiful, go check out the photos!
How does this sound? Camembert with Baked Strawberries and black pepper, Tagliatelle with Strawberries and Lemon Sole, Strawberry Lassi… Intrigued? Well, head over to Paulchen’s Food Blog for a strawberry-based menu that, to me, sounds out of this world!
And finally, go visit What Did You Eat for some Strawberry Coffeecake. This looks so good that I think it will be the very first new strawberry recipe I try!
Update: Just found another interesting strawberry recipe! Rachel at Coconut and Lime made some Lemon Cupcakes with Strawberry Centers and they look yum-my!
Oh, and one more! Deb from Smitten Kitchen just posted a beautiful beautiful Strawberry Rhubard Crumble! If the pies seem like too much effort but you’re craving that strawberry rhubarb combination, this recipe might be right up your alley! If not, go check out Smitten Kitchen anyway, I guarantee you’ll find something to drool over!
Another Update: Have you ever tried Strawberry Bruschetta? I had never heard of it, but after reading the recipe over at Patty’s Pantry NYC, I can’t wait to try it!
Now for more shortcake recipes
Veronica from La Recette du Jour is back to give us a recipe for biscuits that she says are light and crumbly and would also make a nice base for other desserts.
Jen, from The Barmy Baker, gives us her Scrumptious Strawberry Shortcake with lots of mouthwatering photos! While you’re there, make sure to congratulate her, she was recently married :-)
For more beautiful Strawberry Shortcake photos and another great recipe, visit Culinary Concoctions by Peabody and prepare to drool! Her Strawberry Shortcake using Cinnamon Scented Biscuits and Mascarpone Cheese really takes Strawberry Shortcake to the next level!
Now I know that there are tons of strawberry recipes out there, so feel free to add links to your favorites in the comments box below! Enjoy!

A Salad in Dishabille

By - No comments:
While vacationing on the beaches of North Carolina, and spending as many hours watching the Food Network as dipping my feet in the ocean, I began to feel a little ... I suppose I could call it a foodcrush taking hold ... a foodcrush on, well ... a certain Jamie Oliver. Yep, that would be The Naked Chef.

This foodcrush isn't based on the winning power of his crooked smile or English accent (and I will never admit otherwise). The Jamie Oliver foodcrush has everything to do with the food I watched him make while wearing my pajamas in the hotel at noon while my husband (wearing a seer-sucker!) read Charles Taylor on the beach.

A food blogger deprived of the Food Network in her own home makes for a food blogger especially vulnerable to food celebrities and food porn. I admired Giada's breasts and tiramisu. I wanted to touch Paula Deen's hair and taste her fried chicken. I marveled at Rachel Ray's stamina. Iron Chef made me strangely nostalgic for Star Trek. As I watched the challenger break into a sweat, I could just hear Leonard "Bones" McCoy saying through clenched teeth, "I'm a doctor, not an Iron Chef."

And then there was Jamie. He made a leek and prosciutto pasta topped with porcini bread crumbs, which I promptly cooked once back in Pittsburgh, but didn't post--despite its tastiness--because it seemed to resemble this recipe too closely, and, considering the recent paucity of posts, I didn't want to seem like a one-trick pony. Then, Jamie grilled some octopus, tossed it with radicchio and chorizo sauteed in garlic. I had never imagined such a thing: simple, rustic, and--so it seemed to me at the time--a bit on the bawdy side. I suppose that's why Mr. Oliver fashions himself The Naked Chef, an infelicitous appellation, perhaps, read through foodcrush-tinted glasses, it seems not only not silly, but (at the risk of reader eye-rolling) earnest.

This recipe strikes me as naked indeed: juicy peaches, fresh mozzarella, greens lightly dressed in lemon and olive oil, mint to keep things cool, and pepper flakes to spice them up. It's a sweet, milky, tart, and piquant salad, just the thing for humid summer nights. I don't recall ever pairing mozzarella with peaches, but let me tell you now, this is a lovely marriage. I couldn't help but think that the pale and mild mozzarella was taking on the sweet peaches' blush. Cringe, if you will, but I can't help it. This salad is sentimental love poetry on a plate.

While writing this post I remembered that I had already posted a peach salad recipe. It was spinach-based, and featured feta instead of mozzarella. This was the first recipe I posted after moving to Pittsburgh. I was weary of unpacking boxes in the heat, but giddy about an imminent kitchen renovation which has yet to happen. This peach salad recipe may be less imbued with the sort of kitchen fantasies materialized in the form of stainless steel appliances and subway tile backsplashes; instead, it musters fantasies of simple summer dinners prepared in a cramped, ugly kitchen, and eaten in good company. These are fantasies stripped of finery. Thanks, Jamie.

Peach and Mozzarella Salad
Adapted from Jamie Oliver's The Naked Chef Takes Off. Serves 2.


If this recipe has a flaw--and I'm not saying it necessarily does--it would be that it can veer from moist toward soggy. It's a good idea to drain your mozzarella thoroughly, pat it dry, and maybe even press it between paper towels before tearing it into chunks. If your peaches are especially juicy, go easy on the lemon and olive oil dressing.

Good mozzarella doesn't come cheap, and this is not the place to skimp on quality because those rugged little hills of mozzarella are really what make the dish. I've been quite happy with the two brands I've found at Whole Foods, but I've sworn off the stuff sold by Trader Joe's. I've tried it quite a few times in the interest of saving a buck, but found it to be consistently flavorless and rubbery. And that makes for a sad mozzarella.

Jamie Oliver's recipe includes a few thin slices of prosciutto. Sounds good to me, but I didn't have any on hand, and I can't say I missed it.

2 ripe peaches, pitted, peeled (only if you like), and cut into wedges
4 oz. fresh mozzarella cheese, torn into chunks
2 cups salad greens
2 tablespoons lemon juice
5 tablespoons extra virgin olive oil
salt and fresh ground pepper
1/4 teaspoon-1 teaspoon dried pepper flakes (some like it hot, some like it not)
a handful of fresh mint leaves

Whisk together lemon juice, olive oil, and salt and pepper to taste. Toss salad greens in this dressing and divide between two plates. Arrange peach slices and mozzarella on top of greens. Sprinkle with pepper flakes and mint leaves.

Mangoes and Cream

By - No comments:
This week's ice cream was a winner. Oh yes, the ice cream trials have been ongoing. That bowl of burnt caramel ice cream dusted with black sea salt was simply the last effort worthy of a public airing.

I can't say as much for the stuff my ice cream maker has churned out in recent weeks. One batch, it turned out, was suited better for breakfast. Following the gushing praise of a certain Haverchuck (who, for many weeks, conducted his own ice cream project), I poured a batch of sweet oatmeal into my Cuisinart compressor, and hoped for the best. And, really it wasn't bad. Who doesn't like the idea of warm oatmeal-raisin cookies topped with a scoop of vanilla ice cream and a dash of cinnamon? This was, though, a hefty ice cream: oatmeal, cream, and--let's not forget--several egg yolks. Oatmeal ice cream, it turns out, is not really meant to follow food. Only after a fast of, say, 8-10 hours is it a sane option, and that is why it is best eaten with a cup of joe and a side order of bacon. Never opposed to breakfast sweets, Patrick tried it scooped on a pancake and topped with maple syrup. Then he moaned and climbed back into bed.

Ice cream mishap #2 soon followed. I was excited about this one: mint chocolate chip. This was the most popular flavor, after chocolate and vanilla, that I scooped during my time as a North Carolina ice cream counter girl in the mid-nineties. Armed with nostalgia, I read Orangette's recent praise of David Lebovitz's mint ice cream recipe; but there was also a practical factor. At this very moment, a mint patch is creeping across my back yard. This being the first spring we've lived in this house, I didn't even know we had a mint patch. Then, one day, it was there, and it was big. Dreaming of a sustainable ice cream, I waded into my sea of mint, steeped my harvest in cream, poured it in my ice cream maker, tossed in a few handfuls of chopped dark chocolate, and waited. The result was yucky. To put it more precisely, it tasted like dirty grass (with chocolate chips). My guess is that my variety of mint is not the best for imparting flavor to food and drink (the mint juleps turned out yucky, too). No, mine is an ornamental sort of mint, which is spreading like wildfire in my backyard while my basil and rosemary are barely hanging on.

Well, after wasting all of those yolks, this egg-less mango ice cream seemed the way to go. Relatively new to the homemade ice cream scene, I had fallen under the impression that all good ice creams start with custard bases. I was wrong. This mango ice cream, made with a no-cook base of pureed mangoes and cream, is the silkiest, creamiest ice cream I've had in a long time. Far from being heavy, though, it's, well, refreshing. Pale orange and flecked with lime zest, this is a pretty dessert, perfect for hot summer nights. Needless to say, the mango ice cream is long gone, while the oatmeal and dirt flavors are still lingering, sprouting freezer burn.


Caramelized Mango Ice Cream
Makes about 1 quart. Adapted from Roy Finamore's Tasty: Get Great Food on the Table Every Day. Recipe appeared on Chow.com.


For tips on how to dice a mango, go here.

For the caramelized mango:
1/3 cup sugar
1 mango, peeled, pitted and cut into large dice

For the mango ice cream:
2 large (or 3 medium) ripe mangoes, peeled, pitted, and coarsely chopped
grated zest and juice of 1 lime
1/3 cup sugar
1 tablespoon molasses
pinch of coarse salt
2 cups heavy cream

1. For the caramelized mango: Pour the sugar into a heavy medium skillet. Cook over medium heat, swirling the sugar around in the pan often, until it is dark amber. Add the diced mango. The caramel will sputter and seize up. Cook, stirring, just until the caramel dissolves. Scrape the caramelized mango into a bowl, cover, and chill thoroughly.

2. For the mango ice cream: Process the mangoes in a food processor until you’ve made a smooth puree. Add the lime zest and juice, sugar, molasses, and salt. Process for a minute or so to dissolve the sugar. Scrape the puree out a bowl, whisk in the cream, cover, and refrigerate for at least 4 hours.

3. Freeze the ice cream base according to the instructions for your ice cream maker. When it’s just about frozen, add the caramelized mango. Continue to freeze until ice cream is firm. Transfer to a container with a lid, and let the ice cream cure in the freezer for at least 2 hours before serving.

A Soup for Global Warming

By - No comments:
The month of May knows how to please. For those of us who still operate according to the secondary education schedule, school's out. Azaleas bloom, peas shoot, and, at least in our house, years of marriage are tallied up. May 25 of 2002 was hot, a good day for professing one's vows in cotton and seersucker. This past week, we celebrated our fifth year of matrimony strolling the muggy streets of New York, ducking into museums, drinking good chardonnay and dirty martinis. And eating. And drinking. And eating some more. Crunchy calamari. Fried olives stuffed with pork. Cheese plate after blessed cheese plate.

Back in a prematurely hot Pittsburgh, I found myself craving cool soups and salads. Four days into this health food bender, the word gazpacho rang out from a pile of tomatoes like a voice from heaven. On the subject of chilled soups, God has spoken to me in recent weeks in the voice of Martha Stewart.

I know what you're thinking.

Although I tend to trust her recipes, I am not convinced that Martha can channel the Almighty One himself. But, I'm inclined to identify this voice as a heavenly rather than demonic one, seeing as it has been recommending vegetables rather than french fries or donuts. Then again, Satan may fancy a chilled soup in hell every now and then. This will require further discernment.

On the soup itself:

Gazpacho is a Spanish soup that traditionally contains stale bread and vinegar. Today's versions usually omit the bread and cut down on the vinegar. That's fine with me. I'll save such things for panzanella, and keep my gazpacho fresh and innocent. If the experience of picking a ripe tomato straight from the stalk and holding it to my nose could be liquefied and served in a bowl, I think it would be called gazpacho.

Given the simplicity of this soup, you might be inclined to belittle the variations in recipes. But, precisely because most gazpacho is nothing more than chopped and pureed raw vegetables, the difference between good gazpacho and Oh-My-God-So-Good gazpacho lies in the details.

OMG Gazpacho tip #1: Use good, ripe tomatoes. If all you have are pinkish, mealy specimens, step slowly away from this recipe. Your sore wrists and achy back will not forgive you all that chopping unless your tomatoes are worthy.

OMG Gazpacho tip #2: Do not succumb to the temptation of tomato juice. Some gazpacho recipes--but, of course, not Ms. Stewart's--call for a tomato juice base. Open up a can of V-8, chop some vegetables, mix it all together and viola! From what I can gather, this is meant to save you some chopping and pureeing, because it's certainly not meant to enhance the flavor of your gazpacho. Alternatively, Oh-My-God gazpacho is made by pureeing half of your vegetables, drizzling olive oil into the food processor as you do so, to make an emulsified liquid base that tastes like fresh vegetables rather than a virgin Bloody Mary. To this liquid base, you add the remaining half of your chopped vegetables, and viola! OMG!

OMG Gazpacho tip #3: This tip is more of a personal preference than #1 and #2: add a bit of heat and a lot of cilantro. Or a lot of heat and a bit of cilantro. Just don't skip them altogether. The heat, whether from chili peppers or hot sauce, deepens the soup, and the cilantro adds its characteristic zip. I am aware that there are plenty of cilantro-haters out there; but, having come to the firm conclusion that its omission has robbed many a pico de gallo and gazpacho of their excellence, I have stopped worrying over whether or not cilantro-laced dishes will be refused on the grounds that the stuff tastes like soap. If you or yours are of this ilk, try parsley instead.

Cilantro Gazpacho
Adapted from Martha Stewart Living Annual Recipes 2002. Serves 8.

If you should like to serve this soup in small glasses to be sipped rather than in largish bowls like those pictured below, this recipe will serve more people: 12 or so.

5 pounds ripe tomatoes, seeds removed
2 1/2 pounds cucumbers, peeled and seeds removed
2 red bell peppers (green peppers are fine, but the red ones will not compromise your gazpacho's pretty hue)
2 medium jalapeno peppers, seeds and ribs removed if you want less heat
4 scallions, white and light green parts only
1 large garlic clove, peeled
1/2 cup extra virgin olive oil, divided
1 cup fresh cilantro, coarsely chopped, divided
5 tablespoons fresh lime juice
coarse salt and freshly ground pepper
1 avocado, for garnish
1 tablespoon fresh lemon juice

1. Chop tomatoes, cucumber, red and jalapeno peppers, scallions, and garlic. Place in large bowl and toss with 1/4 cup olive oil, 1/2 cup cilantro, and lime juice.

2. In a food processor, puree half the vegetables until smooth. With the motor running, slowly add the remaining 1/4 cup olive oil to the puree in a steady stream until, and blend for 10 seconds longer. Pour puree into a large bowl.

3. Add remaining half of chopped vegetables to the puree. Stir in remaining 1/2 cup cilantro, and season to taste with salt and pepper. Don't skimp on the salt.

4. Chill at least 1 hour. Ladle gazpacho into bowls. Cut avocado into cubes and sprinkle with lemon juice to keep it from turning brownish. Top gazpacho with avocado and serve.